
Take control of your program’s budget.
The Budget Tool lets you track and tweak the issuance of nominations and monetary eCards in your recognition program. With real-time visibility, you can easily prevent under or overspending and keep your program and your people thriving.

What the Budget Tool is for:
- Providing real-time visibility of program spend broken out by the Business Unit or People budget hierarchy (based on your data file)
- Preventing overspend by stopping the approval of nomination/sending of monetary eCards when funds for a specific group have been depleted
- Controlling overspend of the budget by a specific amount
- Giving access to others in the program for administering or viewing the budget
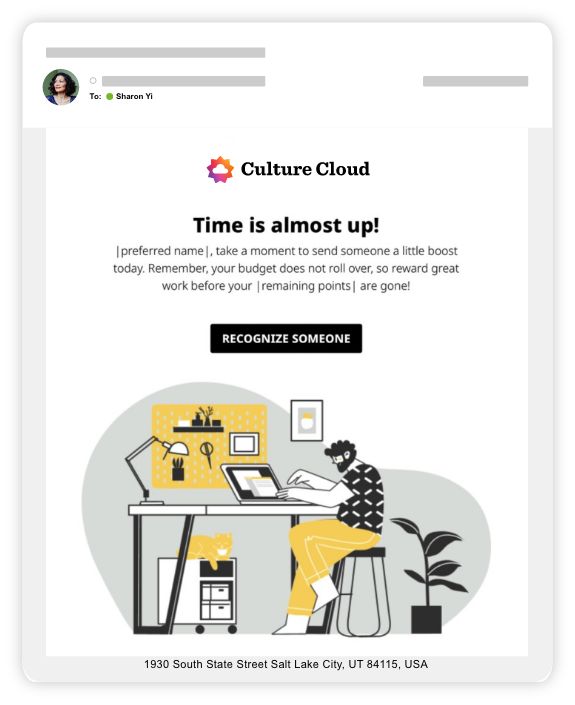
- Reminding employees to send recognition before their budget expires through automated configurable emails (for People budgets)
How to create a new budget
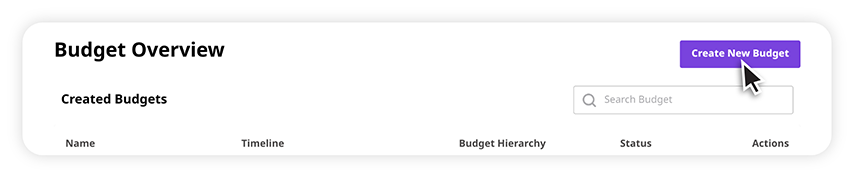
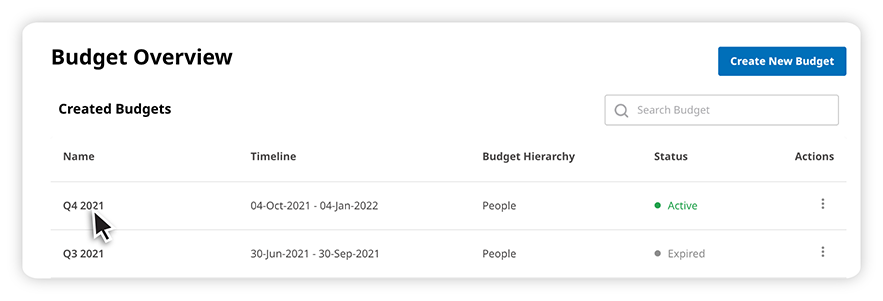
1. Select Budget Overview.
Log in to your recognition program and select Toolbox > Admin Home > Manage Budget > Budget Overview.

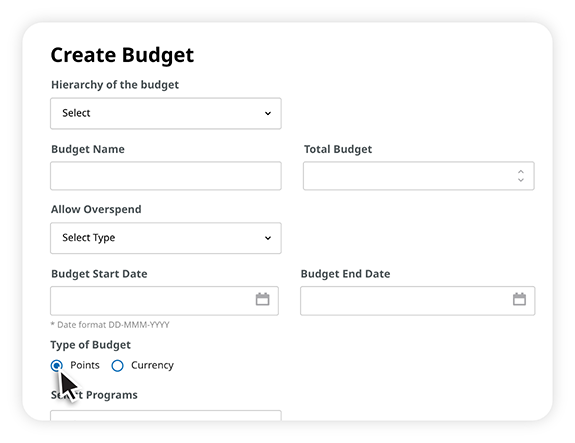
2. Create new budget.
In Budget Overview, click “Create New Budget.” The new budget will be displayed on the overview page with an incomplete status.
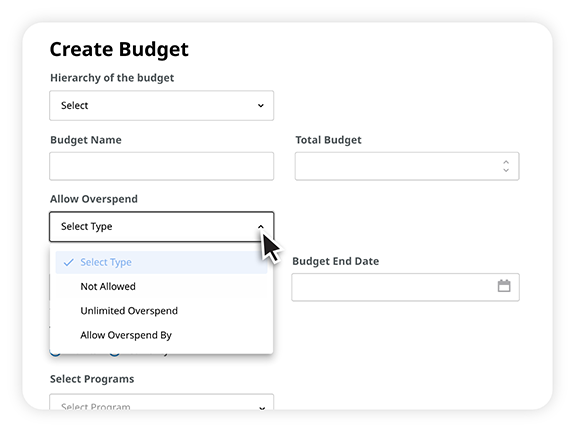
Fill out the required fields:

Budget Hierarchy: Select Business Budget or People Budget. The former is based on your company structure, while the latter is based on your manager structure.
Search base budget segment: Search for the user who is at the top of the organization’s hierarchy (e.g. the CEO). Note: Business Budget will not have this option if it is selected.
Budget Name: Enter a name for the budget. We recommend that you include a reference to the budget timeframe in the Budget Name (e.g. Annual Program Budget: Jan. 1, 2022 - Dec. 31 2022)
Total Budget: Enter the total amount of points/dollars (currency) to be associated with the budget.
Allow Overspend: Select the overspend rule to apply to the budget.
Budget Start and End Dates: Select the budget start and end dates that the budget will be active for. The Start Date must be the current date (i.e. date of creation) or later. Note: You cannot have multiple budgets with overlapping dates.
Enable budget reminder email: For People Budgets, you can turn on automatic email reminders prompting users to send recognition before their personal budgets expire. Click the toggle switch to turn on or off reminders.
Where should funds roll for terminated users: Select if remaining people budget for terminated users should roll into Closest active manager or Budget root.
Type of budget: Select if the Total Budget amount you entered was in points or in a currency amount.
Select Programs: Select the checkbox(es) for the program(s) this budget will be assigned to. Note: Multiple programs can be assigned to a single budget. However, a single program cannot be assigned to multiple budgets during the same time frame.
Budget Charges: Select whether you would like budget deducted from the nominator or nominee’s budget.
Budget Tracking Level: Select whether you would like to track budgets until issuance or redemptions (Issuance tracking is highly recommended if your program is points based as Redemption tracking was developed for Access Code programs). Note: Points tracking only uses issuance, while access codes only uses redemption.
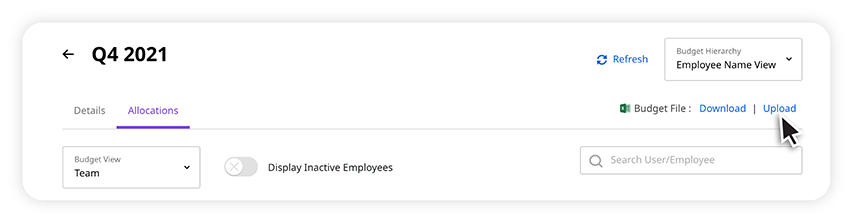
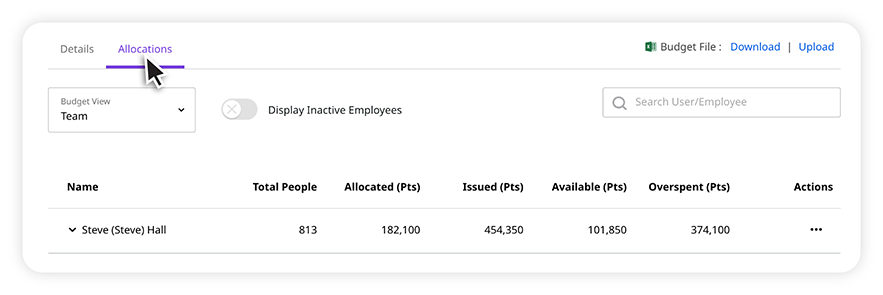
3. Allocate funds.
Click on the name of the budget, select the Allocations tab, and upload the CSV file. You can also download a template to fill out. NOTE: When creating a People Budget, you have the option to allocate budget from a specific manager.
Configuration options
Spend control
There are three options for spend control: unlimited overspend, no overspend allowed, or overspend by a certain percent.
Budget reminder email
When creating a People budget, choose to turn on or off automated reminder emails nudging users to send recognition before their budget expires.

Click “Preview email” to view reminder email.
Terminated Users
Choose where remaining recognition budgets should roll for terminated users: Closest active manager or Budget root.

Budget type
Choose between either a points budget (recommended for international organizations that use multiple currencies) or a currency budget (recommended for organizations that use one currency).
Budget deductions
Deductions can be configured for how the business unit is charged and how it’s tracked (by issuance or redemption).

Pro Tips
Options
Once a budget is created, you can select from the following options on the Budget Overview page: enable budget, clone budget, download admins/viewers, and delete budget.
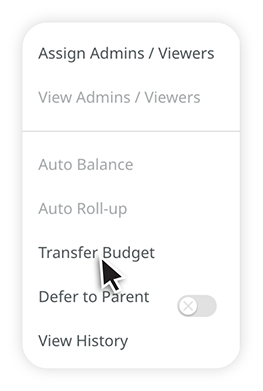
Auto balance
Use Auto Balance to distribute Parent Business Unit-level budgets across Sub-Business Units based on number of receivers, number of givers, or per person. NOTE: For People Budgets, Auto Balance distributes manager-level budgets across all managers within their hierarchy.
Auto Roll-Up
Auto Roll-Up does the opposite of Auto Balance, removing available budget from Sub-Business Units (or managers within the hierarchy) and transferring it to the designated Parent Business Unit (or Manager-level) budget.
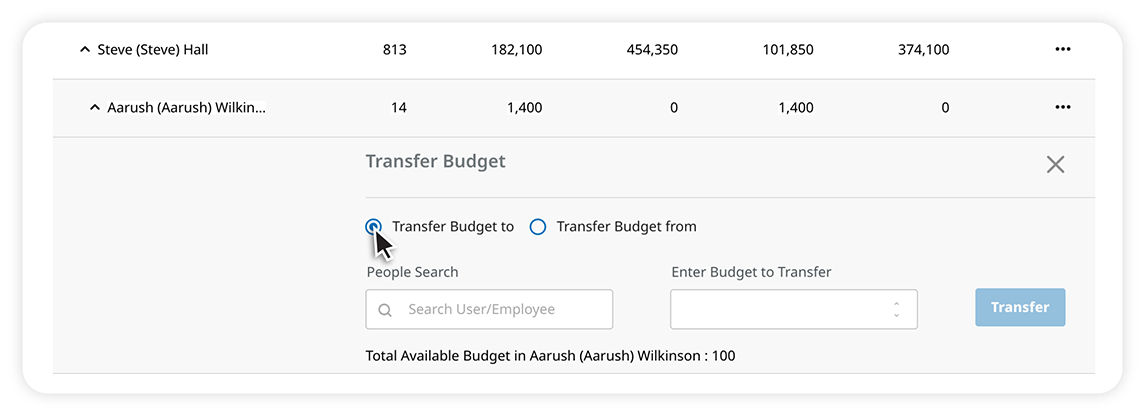
Transferring budgets
1. Navigate to the Budget Overview page: Toolbox > Admin Home > Manage Budget > Budget Overview.
2. Click the name of the budget under the Name column.
3. Click the Allocations tab.
4. Click the arrow(s) to expand and view Business Units until you reach the one you wish to transfer budget to or from.
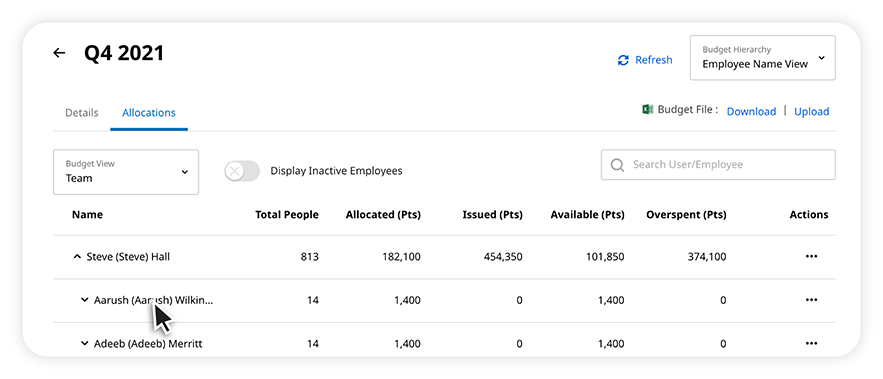
5. Click the vertical ellipsis menu under the Actions header for the Business Unit you wish to take funds from or allocate funds to.

6. Click Transfer Budget in the modal window that appears to show additional options.
7. Select Transfer Budget to or Transfer Budget from and search for the Business Unit or Person to transfer to/from. Enter an amount and click Transfer to complete.
Reporting
The reporting options for the Budget Tool are Data Export and the Budget File, which acts as a Budget Summary report, letting clients see a breakdown of the active budget before making adjustments.
Find the quickest answer below
.webp)
.webp)
.webp)
.webp)
Frequently asked questions
Access codes are usually presented in an email, letter, certificate, or in a printed brochure.
When you receive your access code will depend on the arrangements made by your employer. Many companies choose to present your access code prior to an anniversary; other companies choose to present your access code on your anniversary. If you are not sure of your company’s practice, please check with your manager.
If you have misplaced your access code, fill out the form below for assistance in acquiring your access code.
Please have your manager fill out the form below with the correct information and we will gladly update our files with any changes.
- Open your internet browser
- Locate and highlight the web address of the current page
- Copy and paste or type the web address provided in your company’s email, letter, certificate, or brochure and press enter.
Our websites are a private domain and cannot be found using a search engine.
You can obtain your ring size by visiting any local jeweler or retailer that sells rings. They can do a sizing for you. You can also do a sizing on your own with a ring sizing sheet. Click here and print out the chart to determine the right size.
If you have your access number from your company’s email, letter, certificate, or brochure you can enter your order here.
Click on the track your order link and complete the request form with required information.
Your award may ship to either your home or work location depending on the arrangements made by your employer. When you use the track your order feature only the city and state will be given. To verify the complete address, please fill out the form below.
An address can be changed if the award has not yet shipped; your manager may request an address change if the award is shipping to a work location.
If your award is shipping to your home it should be received 2-4 weeks after you order it. If your award is shipping to your work, it should be received on or around your anniversary date.
Your award may still be in production, or it may be shipping directly from one of our suppliers.
Fill out the form below with required information.
O.C. Tanner, the leader in employee recognition solutions, is pleased to provide you with the most comprehensive warranty available.
If you are not fully satisfied with your award, it may be returned to O.C. Tanner for exchange. Click here to learn about our warranty. However, some companies have chosen to limit or not allow exchanges.
Fill out the form below and let us know the details of any missing parts. We will gladly assist you to ensure satisfaction with your award.
Fill out the form below with required information.
To verify if your order can be cancelled, please fill out the form below.
Take control of your program’s budget.
To change or cancel your order, or for the quickest response, please complete the form below.
1930 South State Street
Salt Lake City, UT 84115
United States of America
4200 Fairview Street
Burlington, Ontario L7L 4Y8
Canada
1 Langston Road
Loughton, Essex IG10 3SD
United Kingdom
Level 7, Tower II, Phase II
Raiaskaran TechPark
Andheri Kurla Road
Andheri East
Mumbai 400072
India
Level 15, 350 Queen Street
Melbourne VIC 3000
Australia
300 Beach Road, #34-07
The Concourse
Singapore 199555